Image Map

28 October 2013

A Sweet Little Pumpkin Party !!!


As you know from my previous posts, this year I wanted our Halloween party to look different. I was inspired by the bright colours of a pumpkin patch and I also wanted the party to look quite girly...
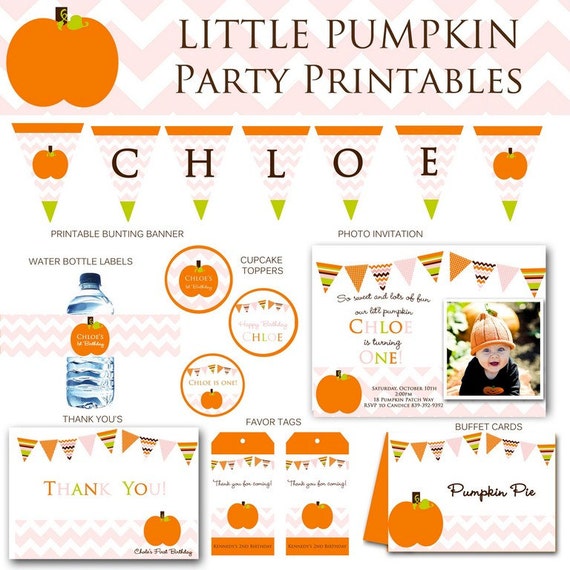
I found the perfect printables at Little Birdie Prints on Etsy, featuring a cute little pumpkin with a colour scheme of orange, green and pink.

I am loving the result !!! All the baking and crafting was well worth it !!

Enjoy the pictures and may I say a huge thank you again to Party City for sending over all the party supplies and making this project possible !


Party styling, baking: That Cute Little Cake
Photography: Lilla Kuknyo Photography
Printables: Little Birdie Prints
Party Supplies: Party City

Other posts you might like to read:


27 October 2013

{Pin of the week} Pumpkin Cookie Tutorial by Lizy B

My favourite pin this week was this Pumpkin Cookie tutorial from Lizy B !
Don't they look amazing ???
I have been wanting to decorate Pumpkin Cookies for a long time (I believe I bought the cookie cutters 2 years ago!!!!)  and my Sweet Little Pumpkin Party was the perfect excuse to finally get them done !
Thank you Lizy B for the tutorial and inspiration to create !


25 October 2013

{Sweet Little Pumpkin Party} Favors


I got everything I needed for these favors in my Party in a Box from Party City:


But being my crafty self (!!) I had to add something homemade to this selection. Since our guests are all girls, I decided to make felt pumpkin hairclips ! I had already made some a few years ago (see this link) but I changed the design slightly and decided to use more curly ribbons here (they are becoming a favourite for this party !!!).


Come back next week to see the look of the finished boxes !!


24 October 2013

{Craft} Pumpkin Napkin Holder


Not so much an actual craft but an embellishment...

I got the plain pumpkin napkin holder from the dollar bins at Target and decided to embellish it a bit to look more like a pumpkin.
I added some curly ribbon and a hand cut felt leaf.
Super easy but it looks great !


If you don't know how to make curly ribbon, then you can see a great tutorial by Glorious Treats here. Don't go spending your money on curly ribbon, just buy plain ribbon and curl it yourself. It only takes half an hour in the oven !


Linky Parties

22 October 2013

{Craft} Pumpkin Plates


I wanted to take the Pumpkin theme all the way down to the plates so I came up with this idea using the paper napkins as leaves !


The supplies are all from Party City and came in my Party in a Box.


Pink Square paper dinner plates
Orange paper dessert plates
Kiwi beverage napkins
Green card
Scissors
Hand-drawn template of a pumpkin leaf, this is what mine looks like:


To make the leaf:

Open a napkin once then fold in two lengthwise.
Use your template to cut out a leaf shape at one end.

To make the stem
Cutout a strip of green cardstock and use your fingers to curl.

To Assemble
First tape a stem a the top of an orange plate.
Lay a pink square plate, then the napkin with the cutout leaf and finally the orange plate on top.
Fold the leaf over the orange plate.

Linky Parties

21 October 2013

A Sweet Little Pumpkin Party for Halloween

I had two very different party ideas for Halloween this year...
Both are quite girly because, let's face it, the two children I have in school are girls so most of their friend are also little girls !!

The first idea was to host a Witches Tea Party, with lots of purple, orange and glitter (!).
The second was a girly Little Pumpkin Party.

This is my first year in California, after living in the UK for over 7 years. In England, in October it starts getting cold. It also gets dark pretty early.
But here, it is still very hot. We got to a pumpkin patch last week wearing tank tops and shorts !!!
So I cannot imagine a dark Halloween.
My head is still full of the bright colours from the pumpkin patch!

Therefore, I went for the second option: a happy Little Pumpkin theme !!!

I wanted a bright colour scheme, of orange and green, but still something quite girly...
I found the perfect printables at Little birdie Prints and Kim was kind enough to modify her Pumpkin first Birthday range into a Happy Halloween one.

I have been wanting to use chevron for a while so this range is just perfect !!!


Now, I feel very lucky that the lovely people at Party City have once again sent me all the party essentials needed to create a fantastic party !!!


I have the best selection to work with and I can't wait to show you what I have done with these supplies.


20 October 2013

{Pin of the Week} Little Pumpkin Cupcakes

And another week gone by in a blur !!!
I am really struggling this school year with one in second grade (with homework), one in pre-school and one at home full time (and no more naps !!!). I just don't know how to get it all done !!! (any advice welcome...).

Anyway, this week I am going to have a lot to share so stay tuned !
After the Detective party (I know, I know, I will be posting the pictures very soon, I promise) I jumped straight into the preparations for another party... I am exhausted but it is well worth it :)

To get you in the mood for my next party, my pin of the week goes to these super cute Pumpkin Cupcake toppers from Lynlee's Petite Cakes.

This Little Pumpkin party from Ellen Bessette Events was featured on HWTM.


Make sure to follow the link for more pictures of this adorable party !


8 October 2013

{Craft} 3D Pumpkin Straw Embellishment


Today you can find me over at Catch My Party where I am sharing the tutorial to make these fun 3D Pumpkin Straw Embellishments !!!

Use bold colours for a fun Halloween Party or a more rustic palette for Thanksgiving.


LINKY PARTIES

6 October 2013

{Pin of the week} Pumpkin macaroons !

Genius ! I love these super cute Pumpkin macaroons I found on Catch My Party this week. Follow the link for more pictures of this adorable Pumpkin Patch Party.


3 October 2013

{Craft} Magnifying Glass plates TUTORIAL


I have been using magnifying glasses a lot for this Detective party: for a banner, labels and door sign. I think it is a cute element and it's been very easy to integrate to the decor and printables.

Now these decorated plates are going to look fun on the table ! There are the only thing I didn't Washi Tape !!! I think they'll look cute just like that ! They should give the dining table a good pop of colours.


They are super simple to make and you only need:
- Small plastic disposable plates
- Construction paper
- Glue strip
- Pencil, scissors

How To:


1: Cut strips of paper. I cut mine 2cm wide so they would come just above the plates top edge.

2. Glue several strips together until you have a piece of paper long enough to go round the plate. 
Close the loop, glue and cut excess paper.

3. Hand draw a handle on a piece of paper or card and use it as a template. 
Draw the handle shape on the construction paper and cutout.

4. Create a small tab by folding the end of the handle.
Glue onto the paper loop already created.

And you are done !

Now if, like me, you are not happy with the handle not staying up/horizontal, just use a small piece of paper folded in two to create a little leg at the end of the handle. 


LINKY PARTIES

1 October 2013

{Detective Party} Party Favors

Since the theme for this detective party comes from my daughter's love for the "A to Z Mysteries" books, it was only natural to buy books from the series as favors....
However, we still wanted our guests to leave with something that would remind them of the party so my daughter and I agreed that the books should come with personalised bookmarks !


I designed those cute little bookmarks with a picture of Detective Noemie on them and a thank you note. Aren't they fun ?? I absolutely love them.


Related Posts Plugin for WordPress, Blogger...