Image Map

30 September 2011

{Party Planning} Part 2 - Party Food

A few observations I made:

- No buffet for kids. They seem completely unable to make a selection and they will end up picking the first snack they see. If you want them to have a decent meal then lunch boxes seem to work really well. The kids are excited to get their own box and they usually eat most of what's inside.
- Seating on the floor is very messy. I would recommend seating them at a table if you can, unless you are having an outdoor picnic.
- Have more boxes than guests. Siblings may turn up unannounced and it is better to be prepared.
- Give them food that they find easy to eat. You won't have time to help every one of them.
- They will spill and make loads of crumbs. And they can't use napkins !


Lunch box
Here is what I served them for the Bear Hunt party.


A small cream cheese and ham sandwich, a packet of crisps (bear crisps !), a cone of carrots and peppers, a yogurt and fruity treat. This was actually quite a lot for them and I will prepare a smaller picnic next time. Since most yogurts and treats were left, I won't be including them in the future. There are usually enough treats on the dessert table.

I also always have fruits available. I made fruit skewers for the Rainbow party and the children seem to have enjoyed them.


Drinks
For drinks I always have water bottles available.
Chocolate milk last sunday was a big hit, they loved it.
Otherwise I tend to include a juice in their lunch box.
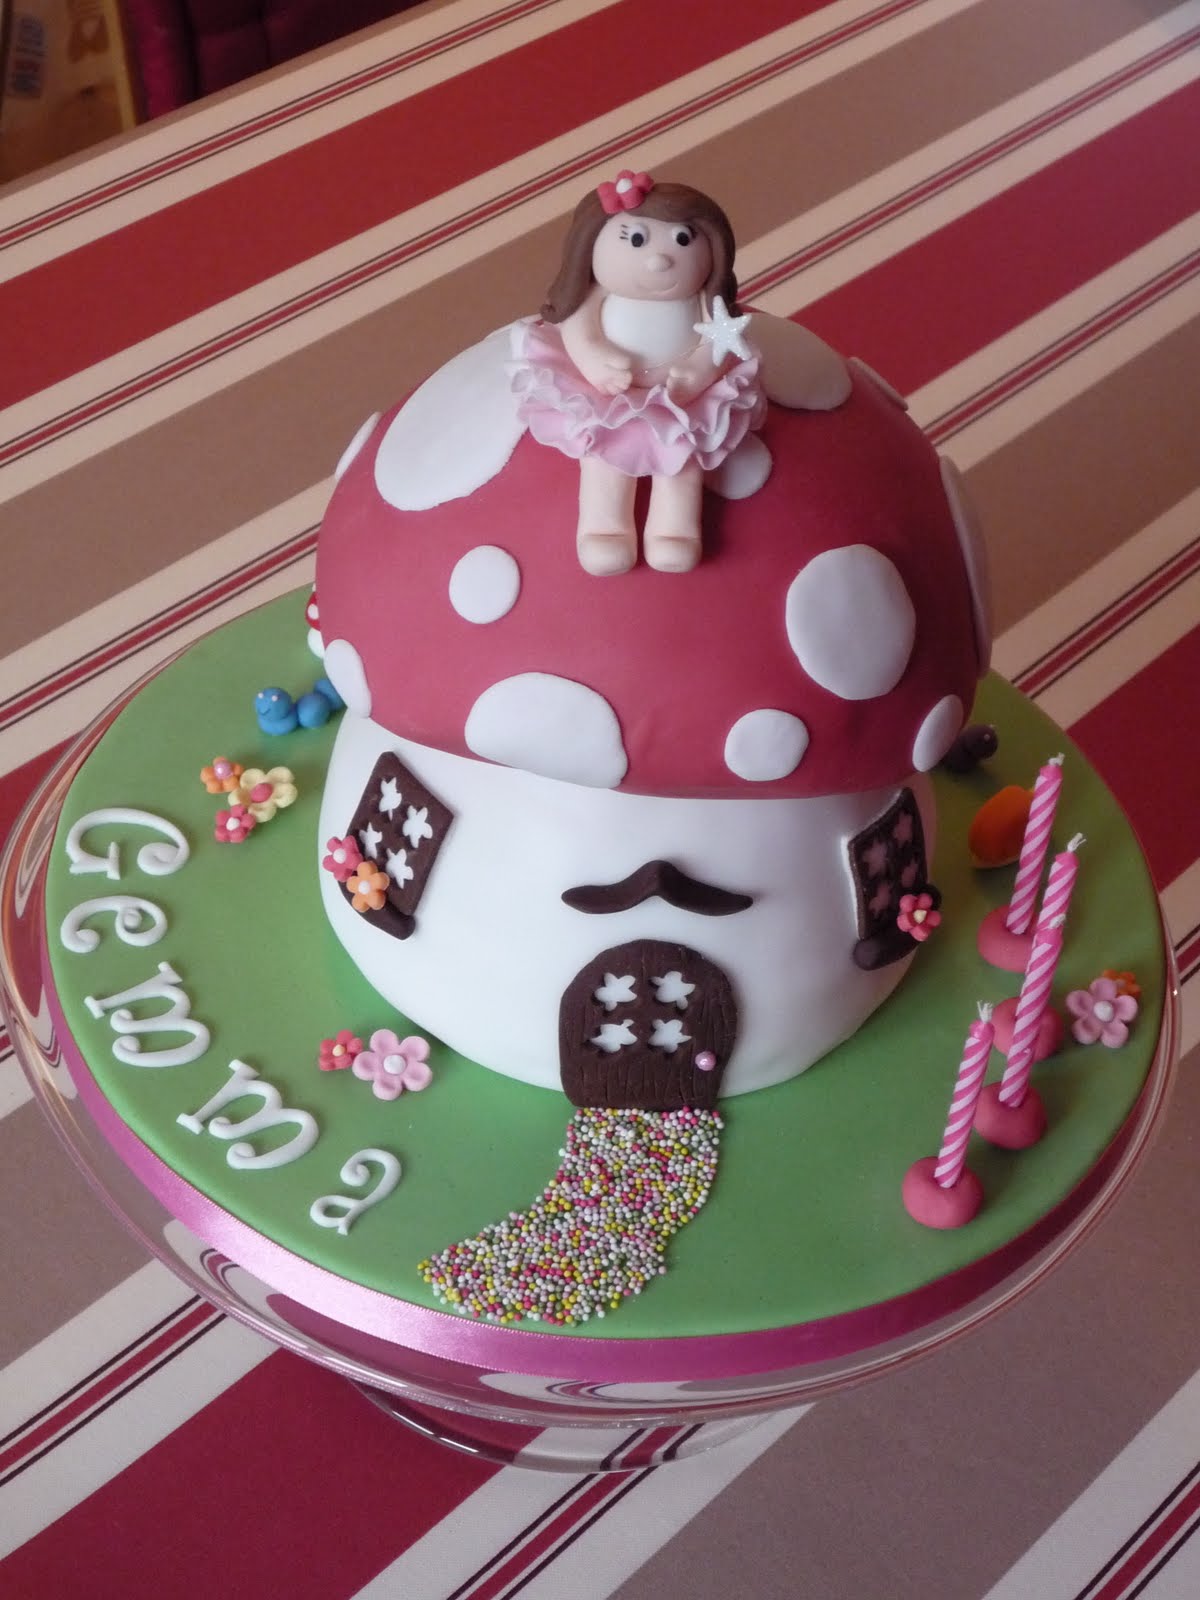
Cake(s)
Not two children are the same but I have noticed that mine are not too keen on their birthday cake. It is just for show and required to blow the candles but they'd much rather eat cupcakes.
Therefore I always have cupcakes for them to eat during the party and the big birthday cake is for the grown ups. A slice of the cake is also given to every child to take home, it seems to be the normal thing to do here in the UK.


Safety
Remember to ask parents about dietary requirements and I think it is better to stay clear of nuts altogether.

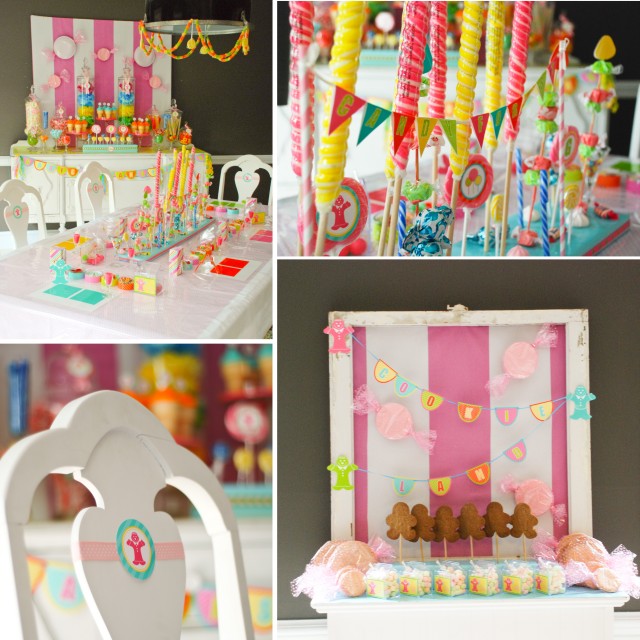
A note to parents with younger siblings. Beware of hard candy lollipops. My 2 year old nearly chocked on one during the party last sunday when the candy broke off the stick. I will not have those lollipops again. 

I never use tooth picks/cocktail sticks or very pointy skewers.

28 September 2011

{Book Review} Bake me I'm yours...Cookie

Today I am reviewing Bake me I'm yours...Cookie from Lindy Smith


This is a cute little book packed with ideas for decorating cookies and although I'm not keen on the taste of fondant covered cookies, most designs can be reproduced with royal icing.

Click here to have a look inside the book on Amazon.co.uk

The book opens with is a good technical chapter. The author details the equipment you may need and shares basic cookie recipes. There is a step by step guide (with pictures) on how to ice with fondant and royal icing. All the different techniques are really well explained and make cookie decorating accessible to all.
The big advantage of using fondant is that you can achieve pretty good results even if you are a beginner. I would say this book is suitable for all levels.

The rest of the book is full of ideas for different occasions (wedding, christening, Christmas...). For every design there is a good size picture and a detailed explanation of the decorating process.
I like decorating cookies because the scale of the project is smaller than a complete cake. With just a few cookies you can try different designs. They also make great presents, for a birthday or christmas.

Here are a few designs I like (pictures from www.lindyscakes.co.uk)


There is an extensive cookie picture gallery on Lindy Smith's website here.


I fell in love with this Happy Feet design and reproduced it with royal icing as a thank you favor when my daughter was born.


My cookies:


The bake me I'm yours range includes the following books:
- Cupcake
- Cupcake Love
- Cupcake Celebration
- Cake pops
- Chocolate
- Christmas (a new one, definitely on my xmas list !)
- Woopie pies (a new trend apparently)


27 September 2011

Amy Atlas Guest Dessert Feature


I am ecstatic !!! Today I was featured on Sweet Design, Amy Atlas's blog !!! This is a bloggers dream come true.

I was waiting for this feature before I could share the Rainbow party pictures with you.

So here are a few pictures and I will share some more details tomorrow.


26 September 2011

{Party Planning} Or how to learn from my mistakes - Part 1..

Well this is it ! My eldest daughter's birthday party is over. All this planning for 2 short hours of fun (on the kids side...).


Two parties in one month was a bit more than I could chew. The Rainbow party was in august and the Bear Hunt one today.
Now I can finally breathe (or start thinking about next year's parties !)  and I intend to share the party pictures ASAP.

I have decided that I should share with you one or two things I learned along the way about kids parties. This is not advice you should follow, just a few thoughts on what works best for me.

This first part is about general party planning. I will talk about the food and activities in further posts.


PARTY PLANNING - Part 1

- START EARLY
Having 3 children under 5, my craft time is very limited. My evenings all start with cooking and sorting out the laundry, and when I'm done with that I have little energy left for crafts and I usually just want to get a few hours sleep before baby wakes up...
So I just start really early, like 6 months before the party (that might sound a bit mad I know). This way I have time to research ideas, find supplies and make all the decorations.
I also get carried away easily, so with more time on my hands I can step back and consider all my options before deciding on what I really want.

- GUESTS
When Noemie was younger I tried to stick with age = number of guests. This worked out quite well.
In any case, do consider the size of your house when deciding on numbers.

- SIBBLINGS
if you have family or friends willing to help look after the younger ones then use them ! Today we really struggled. A baby that needs feeding and a toddler overexcited with the food buffet: not good ! I really thought we would manage, but it was hard work and sadly we ended up not having time for pictures during the party.
I feel parties for younger children can be more of a family / friends gathering. But when they turn 4 or 5, it becomes a party. They expect to be entertained and you then need to be 100% available.

- BUDGET
I always try to keep the budget "reasonable".
I shop around and I look for free printable. I also spend time designing my own printable in publisher. There are loads of digital papers you can buy online (Etsy being my favorite place to shop) and with these you can easily design cupcake toppers and labels to match your theme.
I try and buy prop that can be used with several themes. White plates and platters can be used with any colour.
For tablecloth and background, it is often cheaper to buy fabric by the meter. Also wallpaper turns out to be an affordable way to create a stunning background. Do think about how you background decor should be attached to your wall. If you live in a rented property and cannot drill into the wall, you may have to make a frame to hold your fabric.

- GETTING READY ON THE DAY
If you think you are doing ok with time on the big day, then think again, perhaps you're not !
I remember one birthday when I opened the door to the first guest literally dripping with sweat from stress. I had just finished setting everything up and I had no time left for pictures or freshening up.
My advice would be to do a trial run a couple of weeks before the party. If you are doing a dessert table or a buffet, set it up without the food. This will not only help you see what you are missing, it will also show you if you have achieved the look you want.
Then the week before I make lists, loads of them ! What I need to do, day by day. What I need to buy. Etc.
The house gets decorated the day before (apart from balloon which sometimes deflate during the night).

Only last minute tasks should be left for the party day. This includes food that cannot be prepared in advance (be careful not to have to much of this), pictures, and any outdoor decoration if it might rain.

- PICTURES
Allow at least 1/2 hour before the party starts to take pictures.
Also it may be possible to take further pictures the next day. I find it really difficult to get my children to stand still long enough for pictures during the party. So we sometimes make portraits the next day. Just remember to leave the decorations up.

22 September 2011

{The Great British Bake Off} Week 4

I am two weeks behind due to Birthday party madness but thanks to iplayer I'm catching up !


Week 4 was biscuits.

I don't bake biscuits that often (apart from classic shortbreads and plain biscuits to decorate) and this program did not really inspire me to bake more...

I was not tempted by the biscuits of the first challenge and I am not a Brandy Snap fan.
As for the 3rd part, I myself thought Macaron was an unfair challenge. These are amateur bakers and BRITISH, why on Eart should they know how to bake the perfect macaron ??? I am French and I have never made some (yet...) !

Recipes for week 4 can be found here.

21 September 2011

{Parties} My new friends

Let me introduce you to my new soft (reeeaaaally soft actually) friends.


Since we are going on a Bear Hunt I figured a DIY bear workshop was appropriate. I was going to buy only bears but then I decided to go for a selection of soft animals instead.

I got them from Be My Bear and I only have compliments for their products and service.

The website (or should I say websites since Bear Factory is the same one, and you can also find them on ebay.co.uk) is good. The descriptions are accurate and they have a very good selection of soft animals (in 8", 12" and 15") and clothes.
Delivery was £10, a little dear I thought.. Saying that, items were dispatched and delivered quickly by courier (and they will do rush orders with next day delivery if needed), so it seems worth the high delivery charge.

I called them twice and got an answer straight away. The company is based in the UK and the person I spoke to was polite and helpful.

Now for the product itself. I have to say I wasn't expecting the skin to be so soft. They are truly gorgeous. If it wasn't for the small parts (eyes and nose) it would actually be good enough for a baby !
Each party package comprises of one no-need-to-sew-to-close skin, one bag of stuffing (new), a wishing star, a birth certificate and a party bag. You also get party invitations. On top of that I ordered some T-shirts for the kids to decorate with fabric paint (paint also available to buy with your order).
In your parcel you get a leaflet on how to stuff the bears and a letter with loads of party ideas.
Quite honestly I think they have done a brilliant job. I hope the kids will like them and I believe having the party at home is so much more personal that going to a Bear Workshop in a shopping centre (and more affordable)....

I forgot to say, they have a little video to demonstrate how to run the party. It is good to see how the bears get stuffed and closed. It was a selling point for me to see how easy it is to close them up.


20 September 2011

{Parties} A Bear Hunt Birthday party

My daughter will be 5 on Thursday and we are really busy getting everything ready for the party on Sunday.
Back in January she asked me to have a "We're going on a bear hunt" party because she loves the book so much. And she hasn't changed her mind since, I'm very impressed !

At first I though "Oh dear!"  but actually we came up with a really nice theme, mixing bears and picnic, and creating a decor using a color scheme of Brown and Red gingham.
We initially wanted to have the party in our local country park. We really would have liked a real picnic and a bear hunt in the park.... but the weather has been so unpredictable lately that we decided on a party at home instead. And seeing the weather today I think we chose right... We will be lucky if we have no rain on the day.

So I have been real busy. Crafting for the bear hunt and the party table.
The bear hunt is going to be a little challenge with a prize at the end. The children will be given a card and they will have to go through tasks to collect bear coins and fill their card. Every task relates to the book and they will have to go through grass, mud, a river, a forest and a snowstorm to eventually find the bear in its cave !


Here is a little preview with the invitations. I used a drawing my daughter made and the background is simply red gingham I got from SheryKDesigns on Etsy (it cost me $2 for 40 gingham digital papers in every color you can think of, a bargain).


18 September 2011

{Recipe} Little caramel pots


I made these little caramel pots for a girls' night at a friend's last week (hence the not-at-all-pretty plastic film on the pots for transport purposes !). The printables are freebies from the TomKat Studio.


This is a twist on a more traditional caramel pot recipe. It uses some famous candies for the caramel and so the taste reminds me of my childhood.
They are creamy, tasty and quick and easy to make.


Little Carambar pots
Makes 4 ramequins

200ml Milk
150ml Double cream
3 egg yolks
4 Carambars
50gr Sugar

Heat milk and cream together and when hot add carambars cut into small pieces. Leave caramel to melt slowly in the pan.

Beat sugar + egg yolks until the color turns a pale yellow. Add milk+cream+caramel.


Fill 4 ramequins and place them in a deep oven dish. Fill with water till halfway up the ramequins.

Bake in oven at 170 degrees C for about 35 min.


17 September 2011

{Halloween} Glam Pumpkins

Well, this summer is pretty much over now and we are starting to see loads of post about Halloween everywhere in blogland !

My eldest daugher's birthday party is next week (more about that later) so until then, I can't really start crafting for Halloween. I have to much left to do for the party....!
But I though I would just share with you a couple of cute ways to decorate pumpkins. It seems glam's the word this year.


How about this VERY glamourous pumpkin ? Choose a squash with a white skin for more impact and wrap with pretty lace fabric or why not stockings ? Make a hole at the top for the stem and gather the fabric under the pumpkin.
More ideas like this one on the Better Homes and Garden website.

Or jewel it up like Glorious Treats:


Full tutorial here.

16 September 2011

{Free Printable} Macmillan World's Biggest Coffee Morning Cupcake toppers

The Macmillan World's Biggest Coffee Morning is on 30th September 2011 and one of my friend will be hosting an event. I am part of the "baking team" so I should be making loads of cupcakes.

I have looked on the internet for Macmillan cupcake toppers but since I could not find any I created some using the media available online on the Macmillan website.


Please feel free to download and share.
Just print, cut and fold around a cocktail stick.

Click here to download.


15 September 2011

{How to} ...Make a candy centrepiece

I have just found this post on AndersRuff and this is exactly what I have been wanting to know for a while... : How to display those pops which are so trendy ???


I have used cardboard boxes filled with polystyrene in the past but they were bulky. I guess I was always afraid foam would not hold the weight of the pops. But apparently it does.

They have used styrofoam block for the base. You then cover with paper to match your party theme.


Read the complete tutorial, advice and the party details here.

13 September 2011

{Cake} Mini handbags

Here are some mini cakes I made for a friend's birthday. The design is from the book Cake Chic by Peggy Porschen (review here).


They were very enjoyable to make and they are the perfect birthday present.
They were chocolate sponges with chocolate ganache.
The brown fondant is actually chocolate fondant.


12 September 2011

{Book Review) Peggy Porschen's Cake Chic

This is truly a gorgeous book.
The pictures are splendid and every single project looks amazing !


I have several of Peggy Porschen's books and as with all her books, this one is divided in 3 sections: cookies, small cakes and celebration/tiered cakes. This is really nice since I don't have many opportunities for very big cakes. Instead the cookies and small cakes can be made for smaller occasions (or at least for fewer people).

Her recipes are very good and on top of the instructions for each cake there is a "Basics" section at the end of the book describing basic recipes and techniques such as piping and cake covering.

This is not a book for beginner but if your have some experience in cake decorating, this should inspire you.

I would highly recommend this book and here a few reasons why:


And also of course her magnificent fondant fancies as shown on the book cover...


9 September 2011

{Party idea} The most amazing party decor

I am completely in love with this party from Tradewind Tiaras. The details are gorgeous (what about that cupcake on the swing!!!) and such a fantastic backdrop.


There is a tutorial on how to make the paper flowers for the backdrop here


8 September 2011

{Book review} Cake decorating books reviews

Since I have quite a collection of cake decorating books, I have decided to share with you which ones are, in my opinion, the best ones.
When I lived in Essex, our library had a fantastic selection of cake decorating books and I probably read a couple of dozens before deciding on which ones I would buy. This was definitely a sensible things to do since many hide behind an attractive cover but don't deliver much.
I have to say that two authors/cake decorators particularly amazed me: Debbie Brown, for 3D children party cakes, and Peggie Porschen, for slylish grown up cake.


My first review will be about 50 Easy Party Cakes from Debbie Brown.

This was one of the first books I bough, and this is where the design of my first ever fondant cake comes from.

When I started cake decorating 2 years ago, I enrolled for a class at my local college. Unfortunately, since the information about the course was poor, I ended up in a Royal Icing class, instead of the fondant course I was keen on doing.
After my initial disappointment I realized that this was a lucky mistake since Royal Icing is so difficult to work with. The class was great and gave me the confidence to start decorating cakes. And thanks to the many video tutorials online, I was able to complement the course and learn how to ice a cake using fondant.

This is my first cake:


Of course it was far from perfect and my little indian character ended up being quite pale... but still a good enough first try.


The book gives clear instructions and the recipes are good.
The materials and equipment needed are well listed and the assembly process is easy to follow.
I would say that some knowledge on cake decorating is needed to succeed in making a good looking cake, but this is appropriate for beginners.
There is a design for every occasion. Some are easier than others so you will most probably use this book several times.

I also made the Fairy Toadstool form this book:


original design (bottom left):


A little tip: Most cake decorating shops will rent tins out so you don't need to keep buying cake tins of different sizes. For square cakes, I myself purchased this fantastic piece of kit which allows me to make square and rectangular cakes up to 30cm/12in. A little dear but well worth the investment.


{Craft} Mini paper pumpkins


I have just find a tutorial to make these adorable mini paper pumpkins on Craftaholics Anonymous.
Linda always some fantastic craft ideas so be sure to check her blog.


4 September 2011

{Free printable} Luggage tags


These gorgeous tags are free to download from One Charming Party.
Just print and laminate to personalize your little travelers luggage.


3 September 2011

{Party idea} A wine tasting evening

I found this idea for a wine tasting evening on Rock UR party the other day and though it was great.


We happen to have some chalkboard paint and an old table top so this could be the perfect theme for my next girly evening...

You can find advice on How to Host a Wine and Cheese party on the Rock UR party website here.


{Recipe} Blueberry muffin

Today was a dull day. Cloudy and not very warm. The kind of day when you wear your pajamas all day (well, my daughters did, not me !) and need comfort food !

We had some blueberries in the fridge so we decided to bake Blueberry Muffins.


Here is our favourite recipe.

To make 12 muffins

280g plain flour
3 teaspoons baking powder
1/2 teaspoon salt
110g caster sugar
1 egg
240ml milk
90g oil
140g fresh blueberries, whole

Preheat oven to 190-200C
In a large bowl, sift together flour, baking powder and salt. Stir in sugar.
In another bowl, beat the egg with a fork. Add milk and oil.
Pour all of wet ingredients into dry. Stir just until combined. Gently fold in blueberries at the end, using only 2 to 3 strokes to avoid crushing the fruits.
Spoon into muffin cups and bake for 20-25 minutes. Muffins are done when tops are lightly browned and spring back when pressed gently.


Note: if using frozen fruits, add an extra 4-5 minutes baking.


2 September 2011

{Craft} Bag embellishment

When gathering my daughter's things for school this week we realized her P.E. bag looked a bit dull, so we decided to make a little embellishment.

Before: Very dull bag


She rummaged through my craft drawer to found some ribbon, buttons and felt decorations and together we made this:

After: much better bag !


The bag looks so much better and she was proud to personalize it !


Related Posts Plugin for WordPress, Blogger...